Proven tips to speed up Windows 10
We all know that Windows 10 is the fastest operating system ever released by Microsoft. But with day to day use, apps install/uninstall, incomplete update installations, system file corruption make the system slower. Besides, with every new release, Windows provides new features and updates that demand more system resources. These may increase resource consumption, generating performance issues.
Check out several useful tips and tricks to improve your system’s performance!
Disable Running Apps at Startup
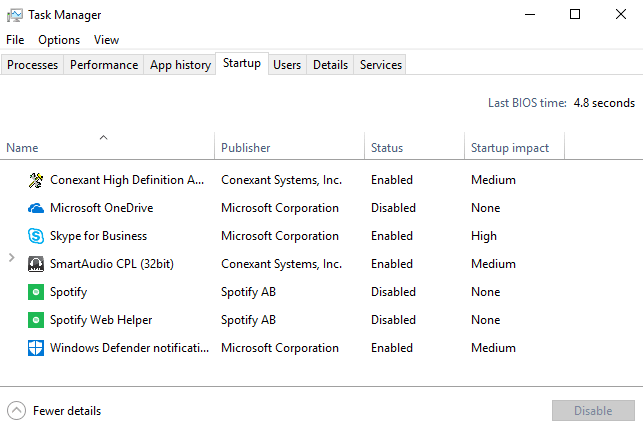
In case you have noticed Windows running very slow or not responding at startup, you may want to disable the unnecessary apps that start along with the system, slowing down the booting process. Disabling such apps will speed up your operating system.
To Disable these applications, right click on Taskbar and select Task Manager, then move to Startup tab, to display the list of startup programs. If you see an app that doesn’t need to be there, click Disable.
Disable Background Apps
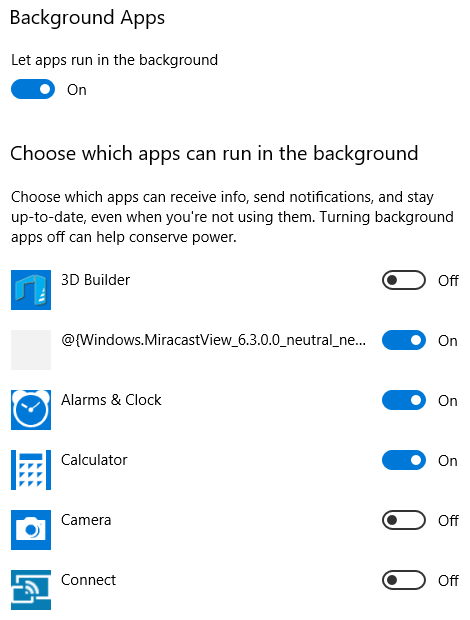
Applications that run in the background use resources as well, they heat up your system and reduce its overall performance. Therefore, it is better to disable them to speed up Windows 10 performance and restart them manually whenever you require. You can Disable background running apps from Settings, by clicking on Privacy > App Permissions > Background apps. Simply turn off the background apps you don’t need or frequently use.
Disable Effects & Animations
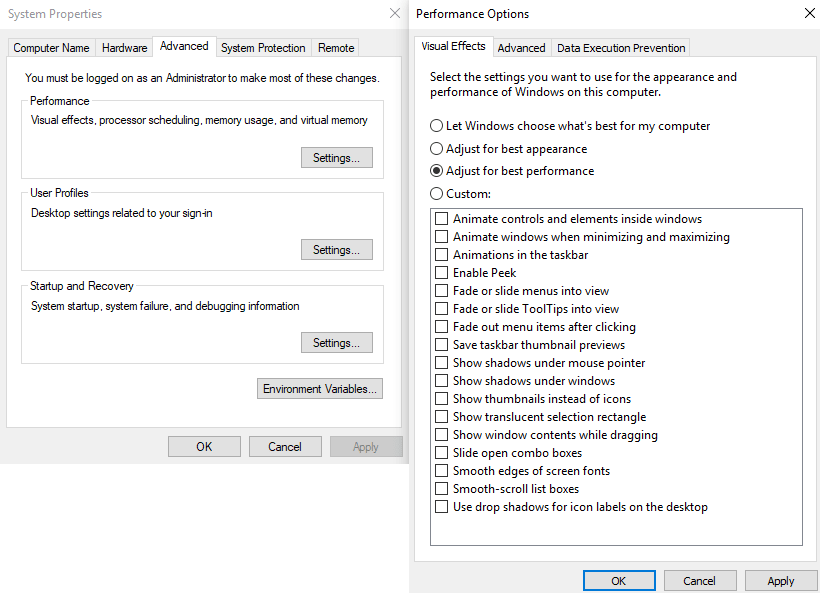
Complex visual effects and animations may impact power and speed especially on older computers. Turning them off remains a viable option to optimize your system’s performance. So, press Win + R, type sysdm.cpl and hit Enter; then go to the Advanced tab, click Settings under Performance, and under Visual Effects, choose the option Adjust for best performance or make a custom selection and click OK.
Disable Sync Feature & Search Indexing
If you are using a Microsoft account to get all your staff on all your devices, Windows 10 will sync several things like passwords, browser settings, system and language preferences etc. with your Microsoft account. Therefore, this feature consumes system resources and internet connection bandwidth. So, consider disabling the sync feature, if you don’t need it, to improve your system’s performance. Click on Start > Settings > Accounts option. In the left-side navigation select Sync your settings and toggle off Sync settings.
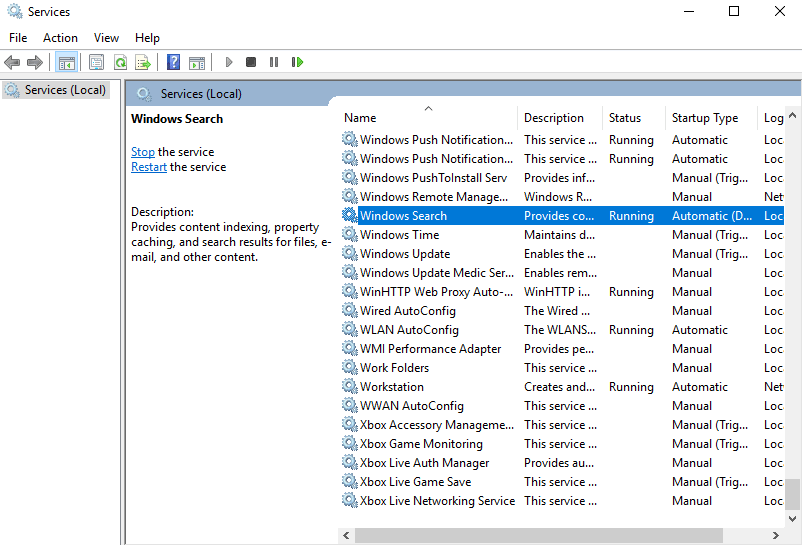
Also, if you rarely use the Windows Search Tool, you probably don’t need search indexing; it improves the search tool’s response time in Windows 10, but it sacrifices performance, because it runs in the background utilizing system resources. So, press Win + R, type services.msc and hit Enter. A list with Windows 10 Services will appear. Scroll down and double click a service named Windows Search. Next, change the Startup type to Manual or Disabled and then Stop the service next to Service status.
Optimize and defragment drives
This is one of the basic ways to speed up your operating system. Usually, On Windows 10, local disk drives are being optimized automatically, but make sure your computer is no exception.
The main reason behind disk drive defragmentation is that the process will increase access speed by relocating files stored on a disk to occupy adjacent storage locations. When the process is finished, your computer will sort and locate files much easier. Regular defrags are helpful.
To defragment the hard drive, click the Start button and click the File Explorer link. Right-click the local disk drive you want to optimize and choose Properties. Select Tools tab and click Optimize.
Adjust Virtual Memory
Virtual memory is a memory management technique of an operating system that uses hardware and software to allow your system to compensate for any memory shortages by temporarily transferring data from your RAM to disk drive storage. Windows 10 manages this capability, but configuring it manually will give you better results.
So, press Win + R, type sysdm.cpl and hit Enter. On System Properties move to the Advanced tab and click Settings under Performance. After that go to Advanced tab and click Change. A new virtual memory window will appear, uncheck Automatically manage paging file size for all drives. Select the C:/ drive and then click the radio button for Custom size. Then set the Initial size to the size of your RAM and Maximum size to double the size of your RAM as for instance, if the size of you RAM is 8GB, set the initial size to 8192 MB and maximum size to 16384 MB. Click the Set button followed by OK. Restarting your system is required.

Remove useless software
Those apps you don’t need may slow down your OS. Removing useless apps will boost your system’s performance, especially if you install lots of programs but rarely use them. To remove software, right Click on start menu and select Apps and Features. Finally, select an app you rarely use and click the Uninstall button.
Create a High-Performance Power Plan
The High-Performance plan in Power options helps you get the best out of your system. This is also a high disk usage solution I wrote about in a previous blog.
Are you interested in improving your workstation’s performance? Does your company need professional IT support services? Let us worry about IT!
